

Check Your Hard Drive for Errors
Windows 10 and 11 let you scan your hard drive(s) for errors while you use your computer – and it’s easy to do.
Let’s check your Windows drive (usually C:\) for errors.
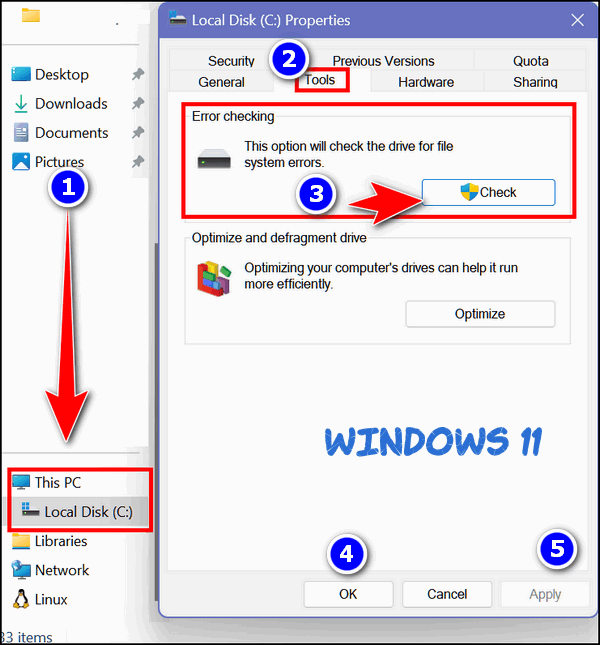
Open File Explorer (Windows Key + E). On the left pane under This PC, right-click on your C:\ drive, and click “Properties”. (Windows 11 users note: You will need to click on “Show more options” to click on “Properties.”) When the “Properties” dialog opens, click the “Tools” tab, and then click the “Check” button.
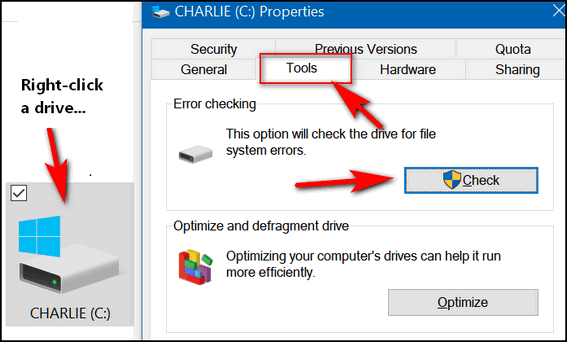
Above: Windows 10. Below: Windows 11.
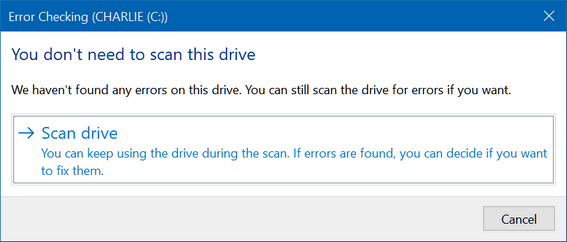
Once you click the “Check” button, the following dialog will appear. It will tell you if you need to scan the drive for errors. If you don’t (as below), it will also tell you that. Even if it says, “You don’t need to scan this drive,” you can still scan the drive if you want to. Just click “Scan drive.”
You can scan any hard drive using this tip.
How to check your hard drive(s) using the Command Prompt.
1.) Type CMD in the taskbar search.
2.) In the search results, click “Run as administrator”.
3.) Type the following command at the prompt and press Enter. (Make sure you leave a space before the slash.)
CHKDSK /SCAN
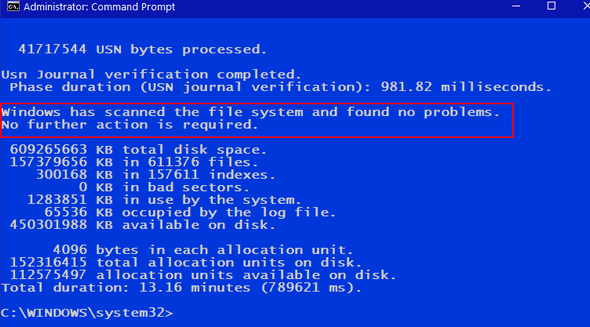
Windows will scan your drive…

Above Windows 10: Below Windows 11.
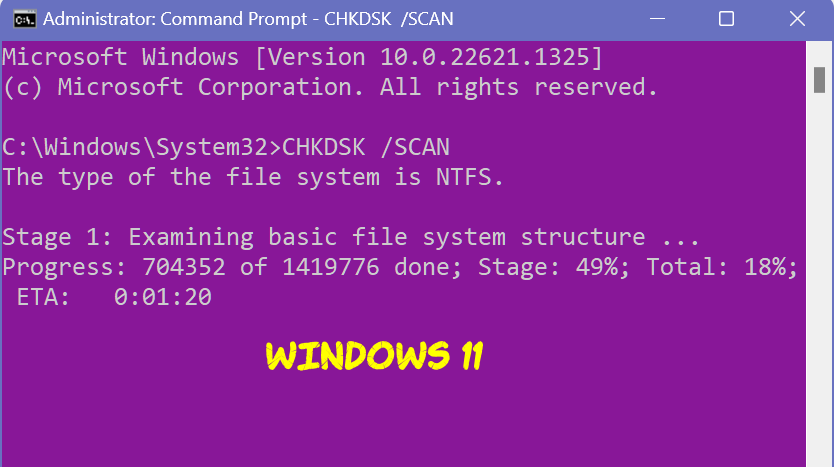
When the scan is finished, Windows will tell you if further action is required. As you can see, I don’t need to do anything more. My drive is fine. Yay!
Now you know how to check your hard drives for errors!
And a couple more things…
If drive errors are found, you can fix them by following the instructions displayed on the screen.
You can use this tip to scan any drive, not just the Windows drive ( usually Drive C:\).
Hi TC,
Please forgive me if this is a silly question.
I know this article’s title refers to checking your “hard drive” – does that mean it applies only to an HDD, and not an SSD?
I know an SSD is very different from an HDD, and certain things like doing a defrag are not needed/potentially detrimental to it.
Since my new Dell desktop has an SSD, I wanted to verify if this procedure is safe to do – or if it’s not even needed.
Thank you for the clarification. You know I tend to overthink things-LOL.
Sincerely,
Marty
SSD and HDDs are both hard drives. Windows provides and easy way to check your hard drive for errors, regardless of which it is. Now when it comes to defragging a hard drive, it makes a huge difference but we were not talking about defragging an HDD or trimming a SSD.