

How to Create Animated GIFs with the Windows 11 Snipping Tool
Did you know you can use Windows 11 Snipping Tool to create a screen recording and save it as an MP4 video file or save it as an animated GIF? You can, and it’s easy to do. You can have a lot of fun with this tip.
OK, let’s get started.
First – Record the Screen
Open the Snipping Tool (by typing SNIP in the taskbar search & pressing Enter, or use the keyboard shortcut Windows Key + Shift + S).
Switch to the Record mode (the camcorder icon) in the toolbar.

Click “New” and drag to select the area you want to record.
Click the “Start” button and record the screen.
Click the “Stop” button (red square) to stop recording.
Second – Export as an animated GIF
Once the recording preview opens in the Snipping Tool window, look for the “Export GIF” button in the top toolbar.
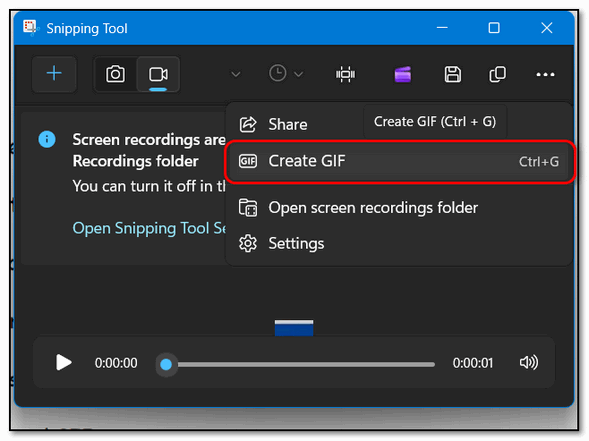
Click “Export GIF”.
A dialog box will appear, allowing you to select the desired quality (low or high). Select low if you plan on sharing it by email.
If the video is longer than 30 seconds, the tool will offer to convert the first 30 seconds.
The resulting file will be saved as an animated GIF.
Now you know how to create animated GIFs with the Windows 11 Snipping Tool. Creating simple animated GIFs is fun and easy using the Snipping Tool.