

Empower Yourself with “GodMode” (Windows 10 and Windows 11)
It seems with every “newer and better” Windows version, the harder it gets to find the most important settings. Windows 11, like Windows 10, attempts to simplify things using a stylish “Settings” menu, which appears to be trying to cancel out the trusty old Control Panel. But not so fast! The Control Panel still contains a host of important options.
We wish we could rename GodMode to something else, but we can’t as Windows 11 (as of now) will not show the correct icon unless it’s called GodMode. But take heart, GodMode actually is a game mode where the gamer has the power to walk through walls – etc. Anyway, regardless of its name, GodMode empowers you with easy access to every feature of the Control Panel all from a list. Because every item is listed by category, you will find settings you never saw listed in Control Panel before.
While you can create a shortcut to GodMode anywhere, we think it is best on the desktop since it’s easier to find. Actually, GodMode is more than a shortcut, it’s a special “magic” folder.
It’s easy to do. Here’s how to create a shortcut to GodMode on Windows 10 or Windows 11.
1. Create a new folder on your desktop (Right-click on an empty space on your desktop and click “New” then “Folder”.
2. Right-click on the newly created folder, choose “Rename” and rename it – exactly as below.
GodMode.{ED7BA470-8E54-465E-825C-99712043E01C}
(We certainly recommend you copy that and then paste it as the folder name.)
3. When you’re done, you’ll have an icon on your desktop that looks like this – yes looks like a Control Panel icon.

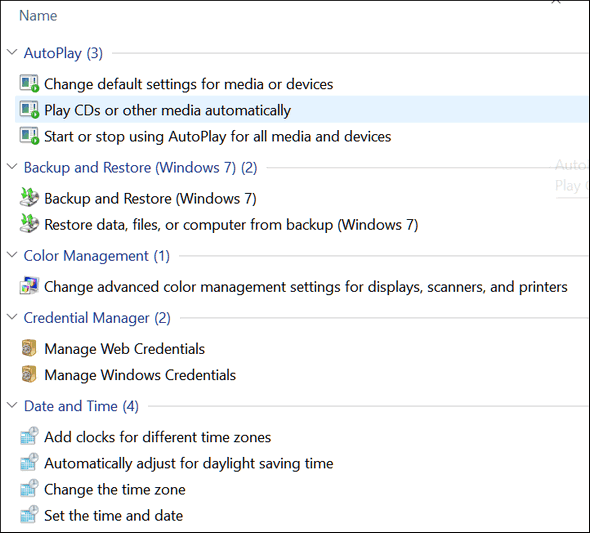
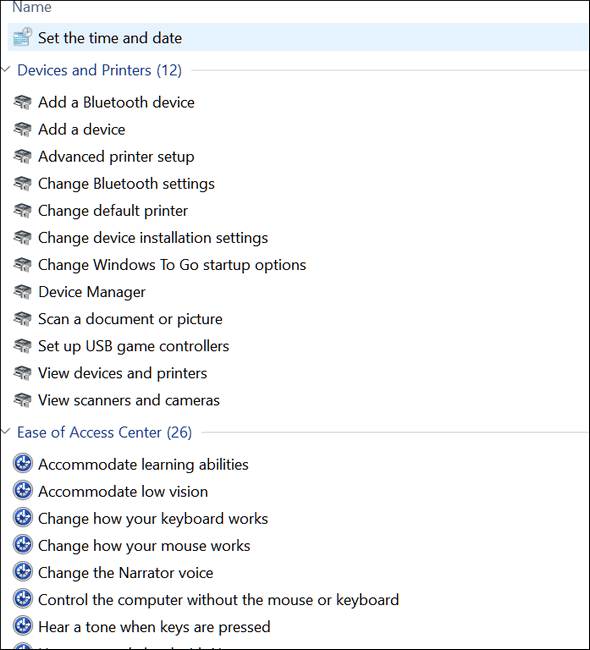
And when you click it, you’ll be empowered with every Control Panel setting — right at your fingertips. Here are some screenshots from Windows 11:

And here’s one from Windows 10…
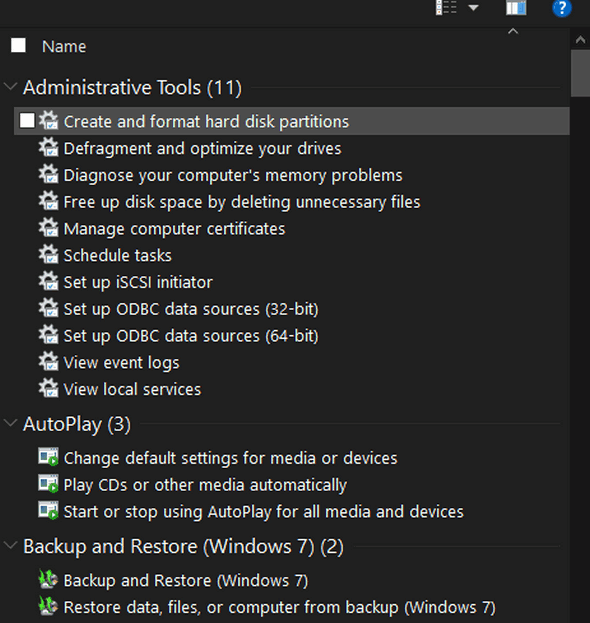
And there are a lot more settings than we show here. A virtual plethora of settings – all available to you when you empower yourself with GodMode.
I do wish a better name than god mode” even with a small g.
Cool Beans!!! Except for the name!
Wow! That is perfect for us “old timers” Thanks so much. I hate settings and control panel!
I created the icon using Windows 10, and the icon shows a red X. Is that a problem? Thanks.
If you see a red-x you didn’t copy & paste the name correctly – otherwise, you’d see what everyone else sees – a Control Panel icon. Best way to do it is to delete what you have and then create a new folder. Right-click on the new folder and choose “Rename” and then carefully copy and paste the following…
GodMode.{ED7BA470-8E54-465E-825C-99712043E01C}
And paste it in as the new name for the folder. I’ve done this many times going way back to Windows XP. It works in Windows 10 and Windows 11. So, all I can tell you is be careful copying and pasting the name. Also, you should always copy left to right – Windows adds a space at the beginning when you copy right to left…always copy left to right for accuracy.
Thanks for the quick reply. I have tried it a few more times. I get the red x before I try to rename it. When I double click the icon to open it I seemed to be getting all the features you listed in your example. Maybe my hand tremor is affecting my clicks. 😉
I tried this but when I right clicked the new folder I wasn’t given the option to Rename.
(Windows 11)
Unlike Windows 1q0, Rename does not show up on the main right-click menu in Windows 11. You have to click “Show more options” to get to “Rename”.