

How to do a Windows 10 Repair Installation
If you’re having serious problems with Windows 10, you probably know by now you that have options to fix problems by using Windows 10 recovery options. All Windows 10 computers have at least the following 2 recovery options:
1. Reset Windows 10 and keep your personal files
2. Reset Windows 10 and remove everything
If you’re using Windows 10 Creators Update or newer, you also have the option to do a Fresh Start.
A Fresh start removes all your programs, including all the manufacturer’s pre-installed programs, saves your personal files and some of your settings, and clean installs Windows. See our article on Fresh start here.
While Windows 10 Reset (and keeping your personal files) or a Fresh start would seem to be a good choice if you didn’t have your personal files backed up, you would still need to install all your programs and make any customizations to Windows you had before the reset or Fresh start.
But there is another option that’s available to Windows 10 users. You can do a repair installation of Windows 10 and keep everything – your programs, your settings, your personal files, etc.
Doing the repair install does not format your hard drive, so it can be used to fix a number of serious Windows problems.
Important: Please remember – in order to be able to do a repair installation of Windows 10, you must to be able to boot your PC. Even though the Windows 10 DVD or USB are bootable, you cannot use either of them to boot into Windows if you want to do a repair install.
First step: Create a Windows 10 USB or DVD
You’ll need a 8 GB USB Flash Drive (we suggest you use a brand new 8 GB USB drive for this) or a writable DVD disc. Using the USB flash drive is easier. Use the Windows 10 Download Tool to download the Windows 10 MediaCreationTool ( available from Microsoft here) to download and create the Windows 10 USB or to create an ISO file you can use to create a Windows DVD.

When you run the MediaCreationTool, choose “Create installation media for another PC”. Do not choose “Upgrade this PC now”.
Windows 10 repair install (also known as a Windows 10 in-place upgrade) can be used to reinstall Windows, load registry keys and configuration settings to a known working state without deleting your files, folders, settings, or programs.
A repair install of Windows 10 is not the same as formatting and doing a clean install of Windows 10. If you can boot your PC, you should always try a Windows 10 repair installation first before resorting to clean installing Windows 10. A Windows 10 repair installation can fix a wide variety of Windows problems without destroying your data or removing your installed programs.
Repair Installing Windows 10
Insert the USB drive or DVD disc you created into your PC. installation process by inserting the Windows 10 DVD or USB into your PC. When prompted, run “setup.exe” from your USB drive or DVD. If you don’t see a prompt, manually browse your USB or DVD and double-click on “setup.exe”.
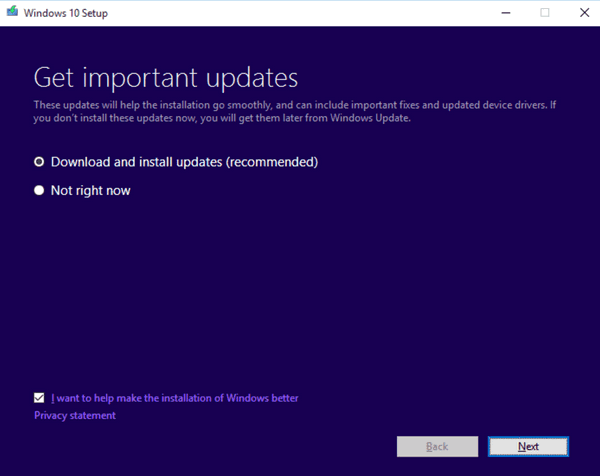
Windows 10 Setup will start with the “Get important updates” window. This is a good idea to go ahead and download the updates right away – if you don’t you’ll just have to do it later anyway.
You’ll see a number of prompts as Windows gets ready to reinstall. Watch each screen and read each screen and select any options you wish. However, when you get to the last dialog – which is the most important one. This is the dialog that says “Choose what to keep.” On this page, you must select the first option, as shown in the image below. If you don’t, you will lose your data and programs. So, pay attention to the final dialog “Choose what to keep.”
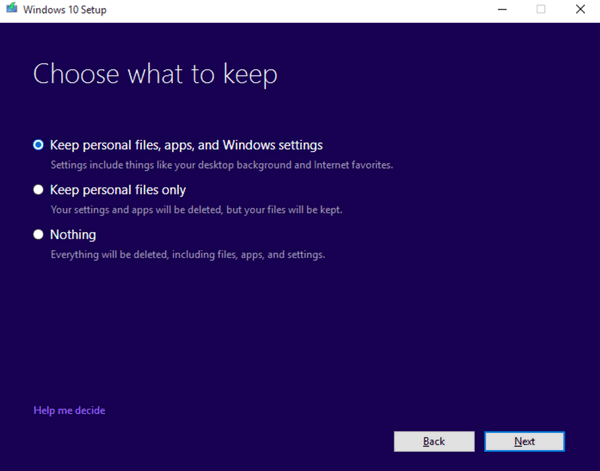
Above: In order to repair Windows 10 without losing any data or programs, you must select the first option: “Keep personal files, apps, and Windows settings”.
We can’t emphasize enough that the last and most important page in the Windows 10 repair installation process is dialog that says “Choose what to keep.” Make sure to select “Keep personal files, apps, and Windows settings”, then press “Next” to begin the repair install:
Your computer will automatically reboot several times as Windows saves your personal files, programs, data, settings, etc. and prepares to do the repair installation. When the process is complete, your files, folder structure, programs, settings, and data will all be safe.
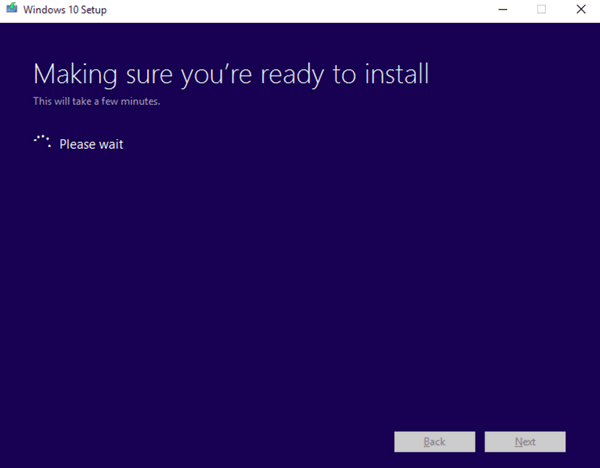
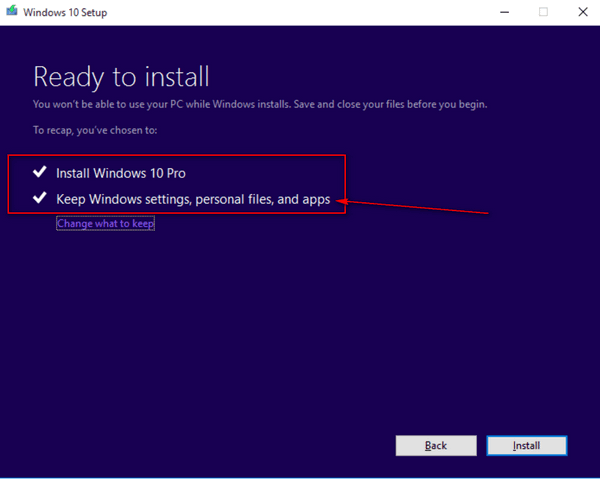
Above – ready to do the repair install. Note: This works with Windows 10 Pro or Windows 10 Home. You have to use the version you currently have installed. You won’t need a product key when you do the repair install.
How the Windows 10 Repair install process works.
With Windows 10, the system files are separated from the user configurations, installed applications, updates, and more. Using new system imaging technology Microsoft has possible to repair install Windows without losing any data or programs for the first time since Windows XP.
We can help you with doing a Windows 10 repair installation, with our Cloudeight Direct Computer Care service.
One final note. No matter how safe or certain any process is, you should always keep good backups. In the computer world, anything that can go wrong, often does. So, we always advise you to be doubly safe – always keep good backups of your personal files.
I may have to use your information for re-installation. However I need to ask you this first. How do I get rid of the little boxes that blank out what is in your email Here is a sample of how they are little blue and green boxes.
I hope you can see this image.
[img]https://i.imgur.com/W3Arcwv.jpg[/img]
We have never had anyone say they can’t see the images on our pages on this site. In fact, I just checked the Repair Installation page out in 3 different computers (Chromebook, Windows 10, and Android tablet) and the information and pictures displayed correctly. What browser are you using?
I’ve created a PDF file and while it has a lot of white space (because of the formatting) all images and text is included. You can download it here.
Download it to your computer and view it with whatever PDF viewer you like.