

A Guide to Making Videos From Your Photos Using Windows 10 Photos App
We receive quite a few asking how to make videos from pictures. So we took some time to play around with the Photos App in Windows 10 version 1903.
Windows Photos App has quite of few features, but they’re certainly not obvious or easy to find. So we’re going to give you some of the basics, then you can use your creativity and take it from there.
The best place to start is at the beginning.
Open the Photos app from the Windows 10 Start menu or type Photos in the taskbar search and press Enter to open it.
At the top of the Photos app, you’ll see an option called “More” with a down arrow to its right. See?
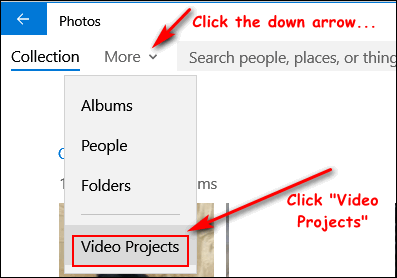
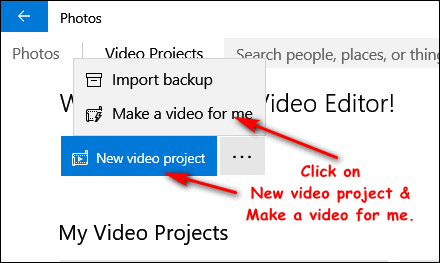
Click Video Projects…. then click the blue “New video project” button then click “Make a video for me”.
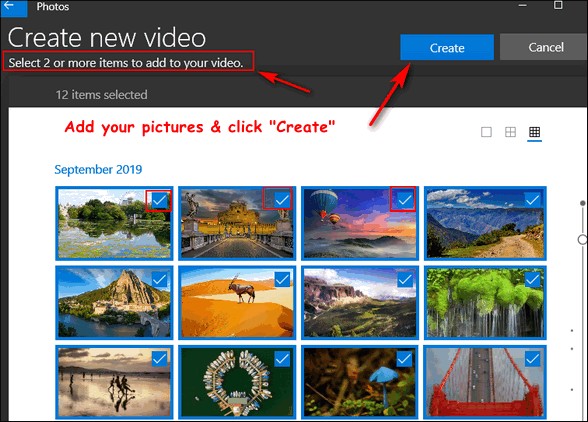
Time to add some pictures to your video. Add pictures to your video project by clicking the box in the upper-right corner of you photos. When you have all the images you want to add to the video selected, click “Create”.
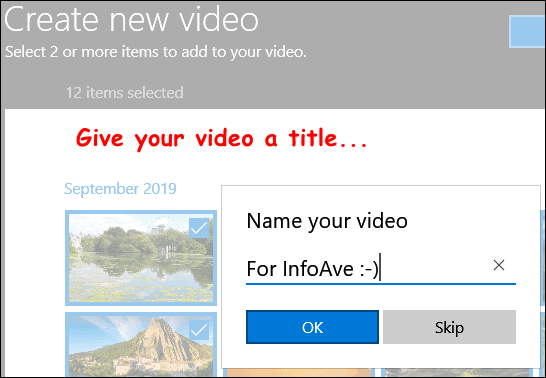
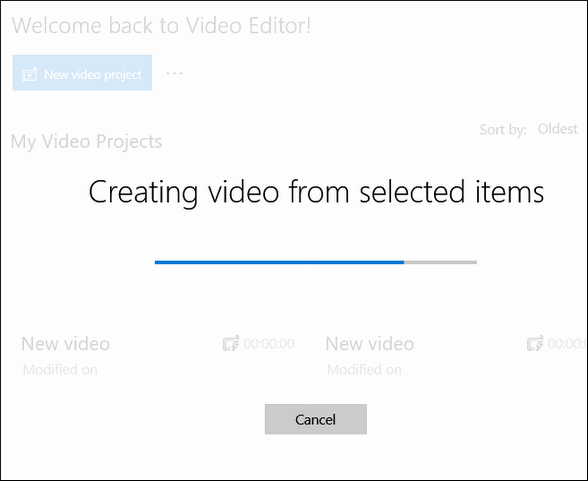
Then give your video a title & click OK.
Click OK and Windows will create you video and even add music that it “thinks” fits the video. Don’t worry, you can change the music, the order of the photos, add special effects, text, filters and more later.
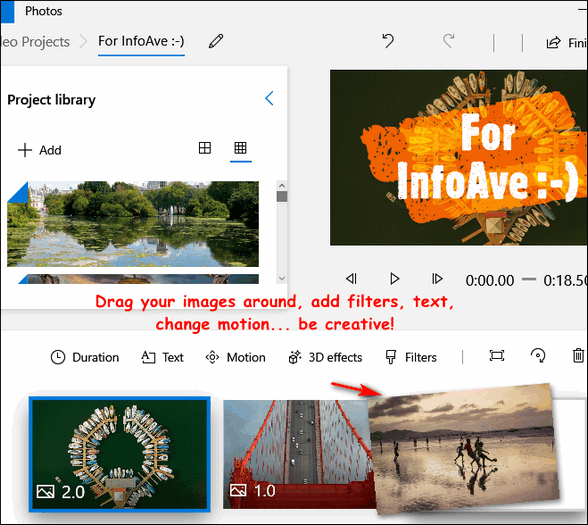
Once the Windows Photos app compiles your video, you can start using your creativity to make it yours. You can drag images around to change the order of the images, you can add text, 3D-effects, Filters, Motion, and even change how long the image appears in the video by clicking “Duration”.
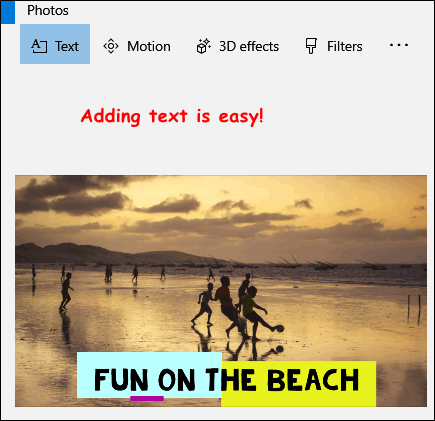
All of the options are easy to use. You’ll have several text styles to choose from, and the Windows Photo app will do its best to make it fit the image. It’s really easy.
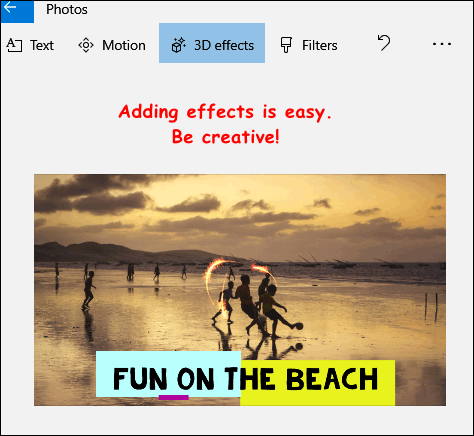
Adding special effects is easy too. Click on 3D effects and choose the effect you want – there are quite a few to choose from – and you’ll get a preview of what each effect will look like on the image.
If you don’t like the music that the Windows Photos app selected, no problem. You can choose from any of the included background music files or add your own custom audio.
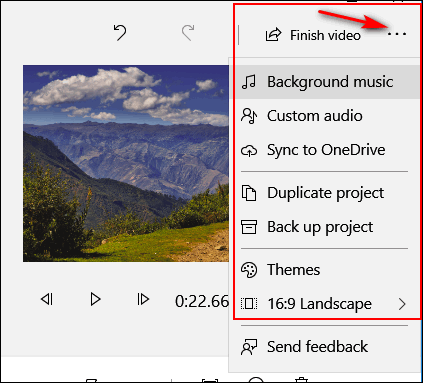
When you have your video just the way you want it, choose the video quality (1080p is recommended), click “Export” and choose where you want to save your video.
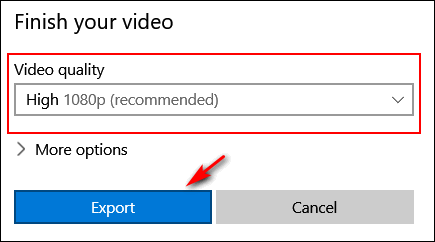
The default (and only) file format Windows Photos app saves videos in is MP4. You can convert MP4 videos into other formats using one of the many online video conversion sites.
And that’s about it. Those are the basics of using the Windows 10 Photos app to create videos from your photos and music. It should be enough to get you started.
We made a quick video for you – nothing fancy but then it only took about 2 minutes to do. We converted the finished MP4 video to an animated GIF for easy & quick viewing. The video we created (MP4) had music, the GIF below, does not. I don’t know if that’s a good thing or a bad thing 🙂
Now don’t be critical, this is just a quickie to show you we really do try this stuff.
InfoAve Quickie

Now go and create videos using Windows 10 Photos app and share them with your family, friends, or share with everyone on social media.