

Add Pictures and Emoji to Windows 10 Sticky Notes
Microsoft continues to improve the Sticky Notes app in Windows 10. Recently a new feature has been added that allows you to insert a picture into your sticky note. You can also add Emoji and bulleted lists as well as changing font styles (Bold, Italic, Strikethrough).
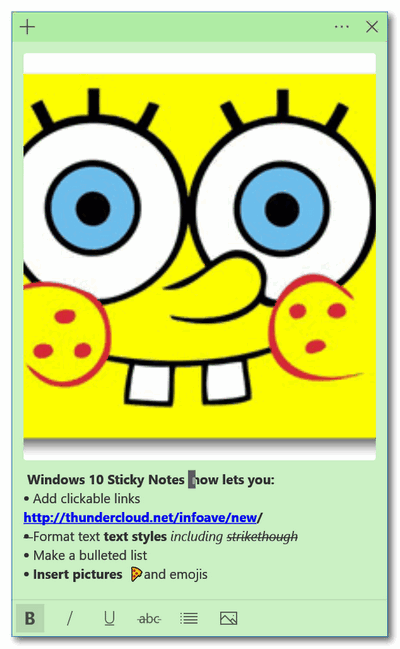
Here’s a cute sticky note that includes a picture of one of my heroes 🙂
Part 1. How to open the Sticky Notes app in Windows 10.
The easiest way first. Type “Sticky Notes” (without the quotes) in taskbar search and press Enter. Or choose Sticky Notes from your start menu. HINT: If you use Sticky Notes often, you can create a taskbar shortcut opening Sticky Notes, right-clicking its icon in the taskbar then choose “Pin to taskbar”.
Part 2. How to add a picture to your sticky note
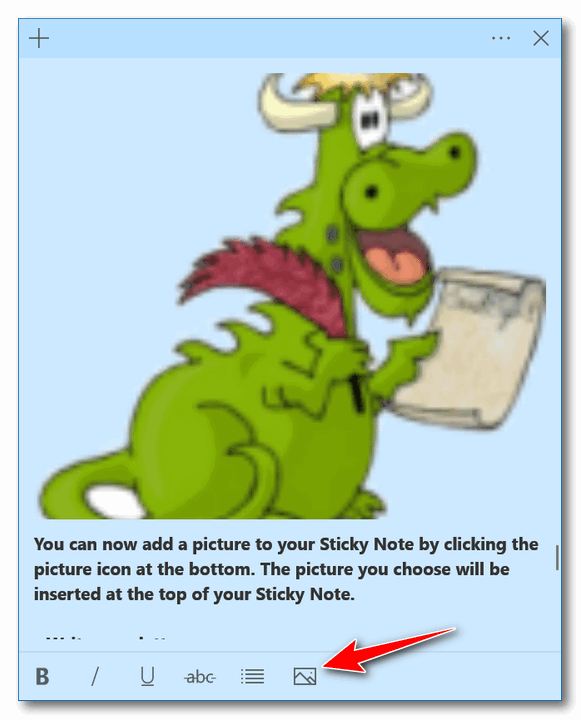
OK, first, keep in mind that, currently, that any image you add will be added to the top of your sticky note. HINT: Compose your sticky note text first and then add the image last.
Then, when you’re ready to add the image to your sticky note, click on the picture icon at the bottom. When you do Windows 10 File Explorer will open. Select your image and add it to your sticky note.
Part 3. Inserting Emoji into your sticky note
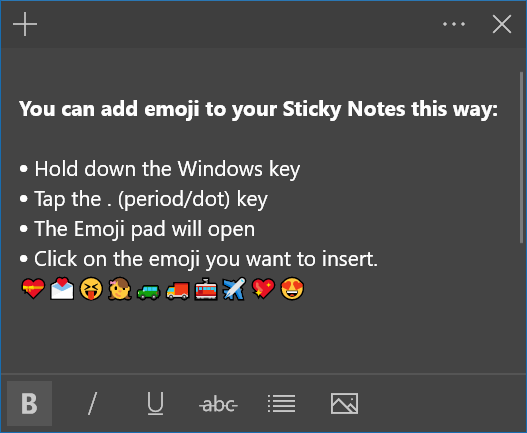
Type your sticky note and format it any way you want. Then press the Windows key and tap the period key/dot key to open the Emoji pad (or Emoji panel as geeks like to say). Then just click on the Emoji you want to add. You can add as many as you want.
For more tips on using the Sticky Notes app, see our Sticky Notes article here.
I like using the picture. Personally it takes away of the plain posting note to me for ones that I keep posted for a while.
Your tips are always welcome…D.