

Check Your Hard Drive(s) Using the WMIC Command
There are several ways you can check your hard drives without downloading 3rd-party apps.
The first way is this:
1. Open File Explorer (Windows Key+ E_
2. In “This PC”, right-click on the drive you want to check
3. Choose “Properties” then click the “Tools” tab.
4. Click the “Check” button under “Error checking.
You can also check your drives using CHKDSK and the Command prompt. See our article here.
And there’s another, lesser-known way, to check your drive(s) and that’s by using the WMIC command. Here’s how:
Open a Command Prompt.
In Windows 10 type CMD in the taskbar search. When “Command Prompt” appears at the top, press Enter.
In the Command Prompt enter the following command exactly as shown (copy & paste works too):
WMIC DISKDRIVE GET MODEL,STATUS
Then press Enter.
Make sure you type the command exactly as it’s shown above or it won’t work.
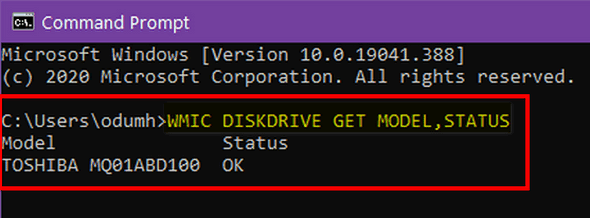
As you can see above, my hard drive is A-OK. You can also see the make and model of the hard drive. If you have an external drive or drives plugged in, the WMIC command will check those as well.
If you get error messages with error codes, be sure to look them up online. If your drive or drives are not OK, make sure your data is backed up on a working external hard drive. Then check them using one of the methods shown at the beginning of this article.
Thanks. Going to try that.
Great tip. Easy to use WMIC DISKDRIVE GET MODEL,STATUS
All drives checked OK
Thanks
Thanks. All is OK.