

How to Check Windows Update History using Command Prompt (or Windows PowerShell)
Windows updates are automatically installed and ensure that your Windows the system is up-to-date with the latest security patches, bug fixes and hotfixes.
You can check your Windows Update history by going to Settings > Update & Security > Windows Update and clicking on “View installed update history”. But there’s another way. And it may be faster for you.
You can check your update history using Command Prompt this way:
Type CMD in taskbar search and press Enter.
At the prompt in the Command window enter the following command:
wmic qfe list
And then press Enter.
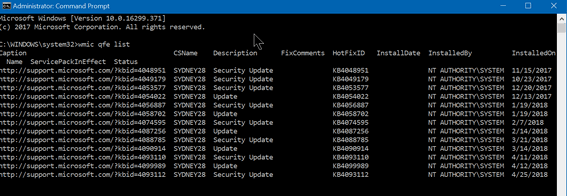
All your updates will be listed in order of installation date. If you’re a Windows PowerShell fan, you’ll be happy to know that you use PowerShell instead of a Command Prompt and achieve the same results.
Good tip, thanks
One thing I wish it would do is advise which updates have been missed.
Sure it’s good to know that I am getting updates but where could I find a list which shows all available updates?
Missed updates will show up in Settings > Security & Updates > Windows Updates right under “Check for updates”
Hi Darcy and TC
Just a comment to let you know that the Windows10 April 2018 went very smoothly and all is working well. It took about 4 hours to complete and finished off with some tips to to personalize my settings and everything in their right places. No black bands around the monitor like an earlier update!! Thanks again for your support.
Bernie
My April update caused black screen and pointer fault. M&S agent guided me through Custom Reinstallation . All data saved but most apps / profs had to be reinstalled. Highlighted need to regularly create a bootable recovery media and an ISO. Only plus was that I ended up with a clean latest system.