

Show selected folders on the Windows 10 Start menu
Windows 10 makes it easy to choose and show selected folders on your Windows 10 Start Menu. Why would you do this? Because it makes it easy to access the folders you probably use most often (Documents, Pictures, Music, etc.)
It’s really easy to add selected folders to your Start menu in Windows 10. Here’s how:
Right-click on the taskbar and choose “Taskbar settings”)
In “Taskbar settings” settings click on “Start”.

Now look down toward the bottom of the list on the right you will see “Choose which folders appear on Start”.
Now, all you have to do is flip ON the switches under the folders you want to appear on your Start menu. See?
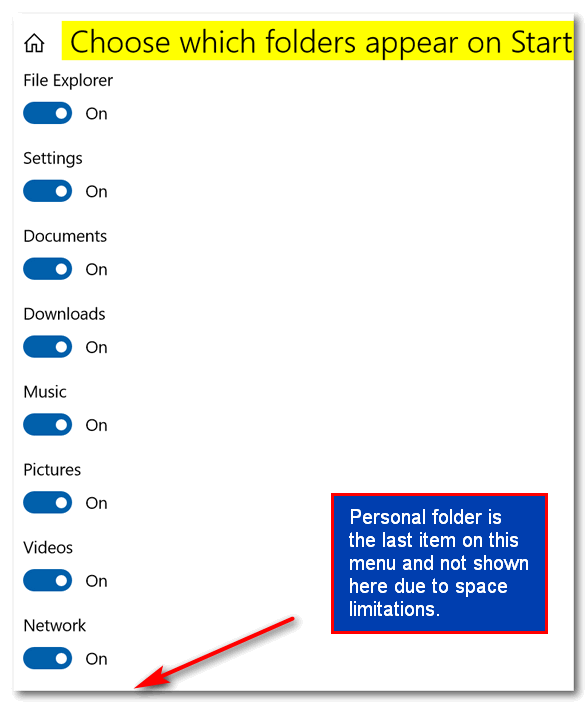
Above: You’ll see some of the folders I’ve chosen to show on my Start menu. Here’s the entire list:
File Explorer
Settings
Documents
Downloads
Music
Pictures
Videos
Network
Personal Folder (this is your User account folder)
And when I got done turning those switches to “On” this is what I now see along the left edge of my Windows 10 Start menu.
From top to bottom the icons represent:
Documents, Downloads, Pictures, Network, Personal Folder (User folder), File Explorer, and Settings. If you’re not familiar with what the icons represent, just hover over them to reveal the name of the folder.

So now, if I want to open my pictures folder I can just click on the Start button and click on the Pictures folder icon.
It’s easy to add select folders to your Start menu and it gives you a new way to navigate to your favorite or most often used folders.