

The Complete Guide to Windows 10 System Restore
Windows 10 has a lot of excellent features. System Restore has been mostly forgotten because Windows 10 offers other great recovery methods like Fresh Start and System Reset. But using Fresh Start or System Reset to fix one problem is likeusing an elephant gun to kill a rat.
You may not need to wipe out Windows and reinstall it using System Reset – which allows you to wipe out Windows, keep your personal files and folders. If things suddenly go awry with your PC and a simple reboot doesn’t help, your first choice should be System Restore.
System Restore can erase changes to your computer that may be causing problems without removing all your desktop programs. So why doesn’t Microsoft make System Restore easier to find and to use on Windows 10? We have no idea.
Turning on and configuring Windows 10 System Restore
First, let’s make sure that System Restore is turned on and configured correctly.
It’s always good to start at the beginning, right?
Type Create Restore in the taskbar search and press Open when you see Create a Restore Point appear in the search results.
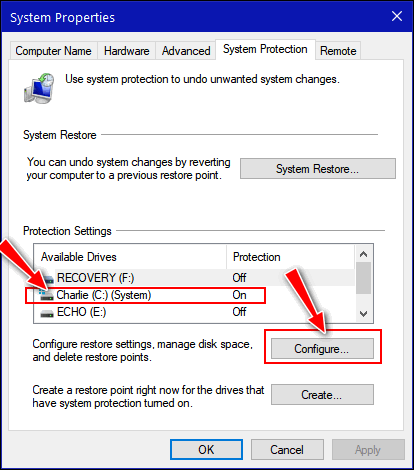
The following dialog will appear the System Protection tab should be pre-selected. If it is not, click on the System Protection tab. Make sure you Windows drive is selected – usually this will be drive C:\.
Then click on the Configure button near the bottom. See the picture below:
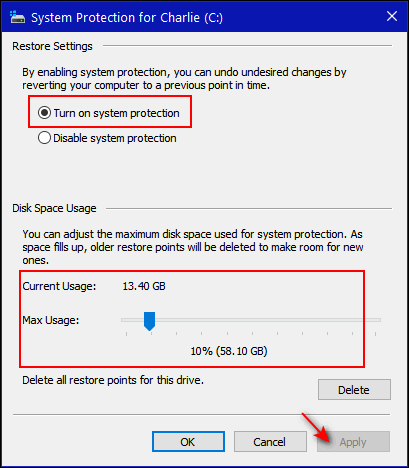
Tick the circle next to “Turn on system protection” (if it’s not selected already). Slide the max usage arrow from 2% to 10% depending on the size of your hard drive. Don’t go over 10%
After you’ve done the above, click “Apply”/ “OK”.
Creating a Restore Point
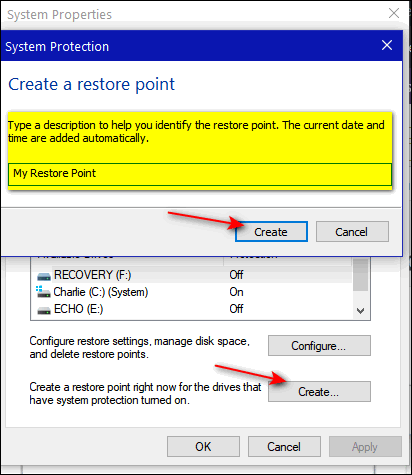
Click on the Create button on the main dialog (inside the lower red box in the image below). A Create a restore point dialog will appear.
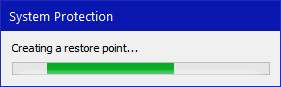
Give your new restore point a name (Hint: Windows will always append the date to the name you provide so you don’t have to use a date in the name.) Now click the “Create” button on the “Create a restore point” dialog (see below):
Windows will start creating a restore point with the name you gave it.
When it’s done creating the restore point, click OK on the main dialog.
Now that you have created a restore point, Windows will automatically create system restore points at intervals it decides – it will use up to the maximum space you allowed for System Restore when you set it up.
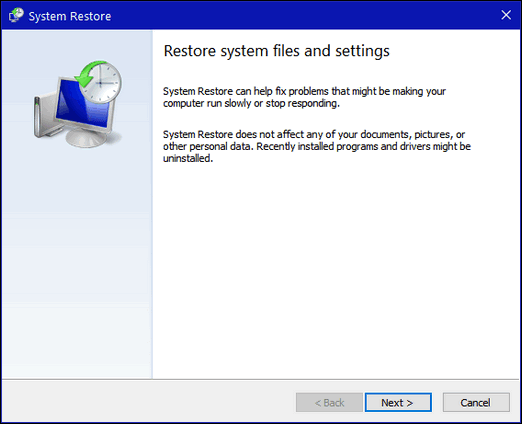
How to use System Restore to restore your computer to an earlier time
But what if you need to restore your computer using your restore point(s)? Press the Windows Key plus the “R” key (or right-click the start button and choose “Run”). In the run dialog type RSTRUI and press enter.
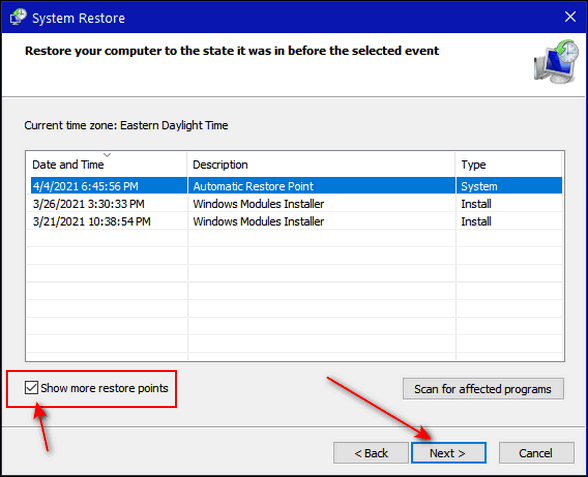
Make sure you tick the box at the bottom next to “Show more restore points” so all the restore points available are shown. Click on the restore point you want to use to highlight it, (as you can see above, I chose a restore point dated April 4, 2021). then click “Next >”
The next dialog asks you to confirm your choice. It also gives you a chance to see what programs will be affected by the restore operation. The only programs that will be affected will be programs that you installed between the restore point you choose and the date you do the restore.
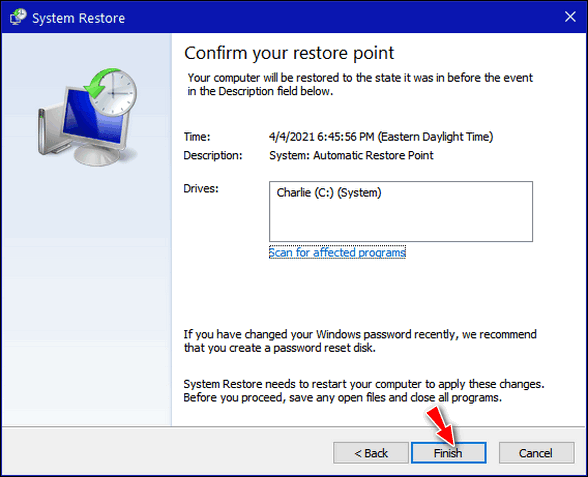
When you’ve confirmed the restore point, and optionally, checked to see what programs may be affected – you’re ready to go. Click Finish.
You will have one more chance to cancel the System Restore. If you chose to continue with it, you will have no further options to cancel it. Once it starts. you won’t be able to stop it. It will continue to run until the restore operation is complete.
A System Restore usually takes from 30 to 60 minutes – but it can take longer. You must let it finish though it appears nothing is happening. Turning off your computer or rebooting during a restore is an invitation to PC catastrophe.
System Restore is a good way to restore your computer to an earlier time should something you install cause major problems. But it’s not a panacea for all computer troubles. And sometimes System Restore will complete and you’ll get a message that the System Restore operation was unsuccessful. If you do get that message and you have other restore points available, you can try running restore again using a different restore point. If that fails, you still have the option to use System Reset and keep all your personal files.
I have a question?
Can I do a restore point on the D Drive since I save things on that drive and use the C Drive for the operating system mainly ? I followed your directions and I did have restore points “On” on both the C & D drives, but I did the D drive the same way as you instructed to do the C Drive but it just came back to the C Drive when I checked to see my restore points.
I have been saving things to the D drive since that is 931 GB and the C Drive is only 104 GB and 48 GB of that is used up with just the Windows operating system. When I purchased the laptop was supposed to have 1 TB Hard Drive & 128 GB SSD storage and 8 GB Ram Memory. It is a Dell Inspirion Model 13780-5032 Intel Processor Core I5-8256U 8th Generation. Hopefully this will be an okay Laptop.
You can do a restore point on any drive. All you have to do is to turn on System Restore for that drive. Keep in mind, if you have a lot of data on that drive you’ll have to increase the percentage of space you allow for system restore to use.
Thank you for the education. Your tips are so knowledgeable, so ….I am also saying…. so are you both… Thanks for always being there for us folks.