

Using Custom Colors in Windows 10
This tip applies to Windows 10 Creators Update (version 1703) and newer.
In previous versions of Windows 10, you could let Windows choose a color from the background on our desktop, or pick one of a few dozen preset colors. In Creators Update, you have the option of creating your own custom colors using a simple color mixer.
Get started by going to Settings > Personalization > Colors

Then click on Custom Color

In the first dialog, you can chose a custom color by moving the circle (above in the color area) to the basic color you want. Then you can adjust the shade of the color with the slider. If you want even more control, click the down arrow next to “More”.
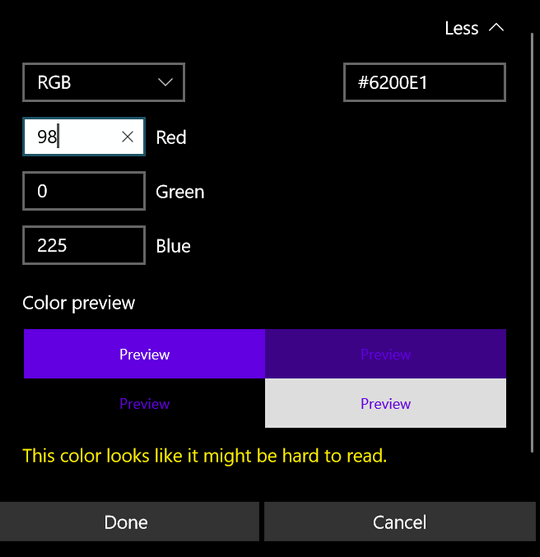
You can use RGB (Red, Green, Blue) or HSV (Hue, Saturation, and Value). You can play around with this until you find exactly the color you want. Notice, Windows will tell you when it thinks you’ve chosen a color that will be “hard to read”. However, do not let that discourage you; it says the color I chose (dark teal) might be hard to read, but I can read it just fine. And if my old eyes can read it, well… it can’t be too hard to read!
The color you choose will be the color of the background on your start menu, title bars, taskbar, etc.
Have fun. Now go color your Windows world.