

How Delete Temporary Files Using File Explorer
This tip is for Windows 10 and Windows 11
If you’ve ever used Storage Sense (Settings) or Disk Cleanup to remove temporary files, you’ve probably noticed there are still a lot of temporary files remaining after you run the cleanup.
If you want to clean up nearly all of the temporary files on your computer, you can do that using File Explorer.
1. Important: Save anything you’re working on and close all open programs.
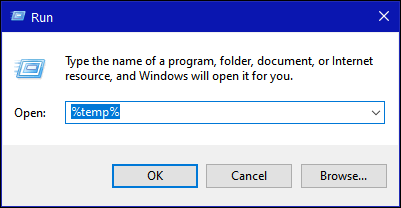
2. Press Windows + R to open a Run box.
3. Type %temp% into the Run box and press “Enter”.
4. A File Explorer window will open with a lot of temporary files and folders. Press Ctrl + A to select all the temporary files at once. When all are selected, right-click and choose “Delete”.
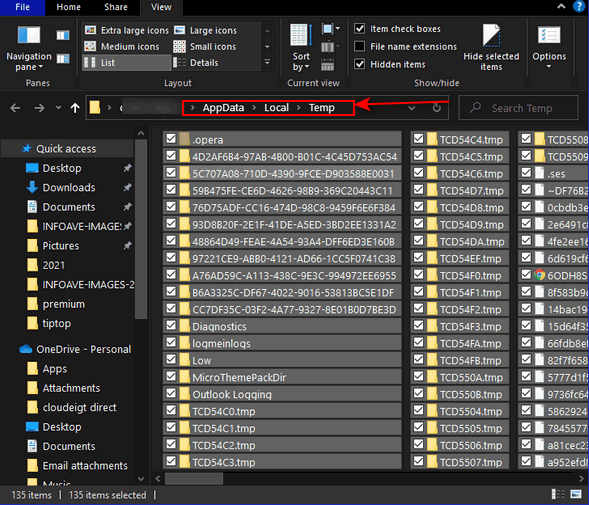
IMPORTANT: If you get a warning that certain files can’t be deleted – it’s because they’re in use. If you see this warning, choose “Skip” to continue.
5. Press the Windows key + R to open another Run box. Type TEMP in the Run box and press “Enter”.
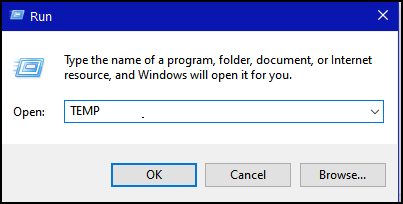
NOTE: You may get a warning that you don’t have permission to access this folder. If you do, just click “Continue”.
6. Press CTRL+A to select all the files and folders in the directory. Once they are all selected, right-click and choose “Delete”.
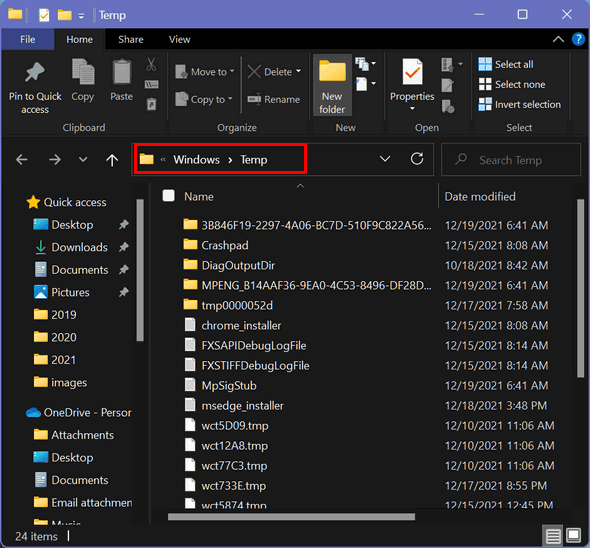
Again, something to remember – You may get a warning that certain files cannot be deleted. If you see this click “Skip”.
You’re almost done.
7. Right-click the Recycle Bin icon on the desktop and choose “Empty Recycle Bin.”
That’s it. Now you know how to delete almost all of your temporary files using File Explorer.
You can never delete all temporary files because as long as Windows is running, temporary files are constantly being created.
Wait! Before you go…
Every week we help dozens of people with their computers without charge or any expectation of payment. And we have helped many folks who have fallen for tech support scams or other scams designed to steal their money.
And we now depend more on readers like you to help keep us going. Your donation helps us to help more people with their computers and helps us keep everyone safer online.
Please help support our small business and help us to keep on helping you.

Can we give using Pay Pal
Hi Helen, yes you can. That’s easy. Go to https://thundercloud.net/donation.htm and choose the amount you want to give and click “Buy now” – the primary option is PayPal. Thanks so much, Helen.
I tried these tips but never got the option to Delete (Windows 11)
Windows 11 is not a temporary file and this article was about deleting temporary files. The only way to go back to Windows 10 from Windows 11 is going to Settings > Windows Update > Update History > Recovery Options > Go Back. And if the Go Back button is grayed out you can’t go back to Windows 10. You can only go back to Windows 10 without losing anything if you do so within ten days of installing Windows 11.