

Storage Sense – Clean Up Windows 10 and Windows 11
There are dozens of programs that you can download to clean up your Windows computer. Windows even comes with Disk Cleanup which was supposed to be deprecated by Microsoft some time ago but wasn’t – at least not yet. Of course, then there are Privazer, BleachBit, and CleanMgr+ as well as the popular (but not popular with us), CCleaner.
Somewhere, along the way, Windows Storage Sense has been forgotten. So, we’re going to revisit Storage Sense for Windows 10 today. We’re also going to introduce you to the streamlined Storage Sense in Windows 11.
Windows 10 Storage Sense
Right-click the Start button and choose Settings. In Settings choose System > Storage.
If you have not done so already, turn on Storage Sense by sliding the switch to the “On” position.
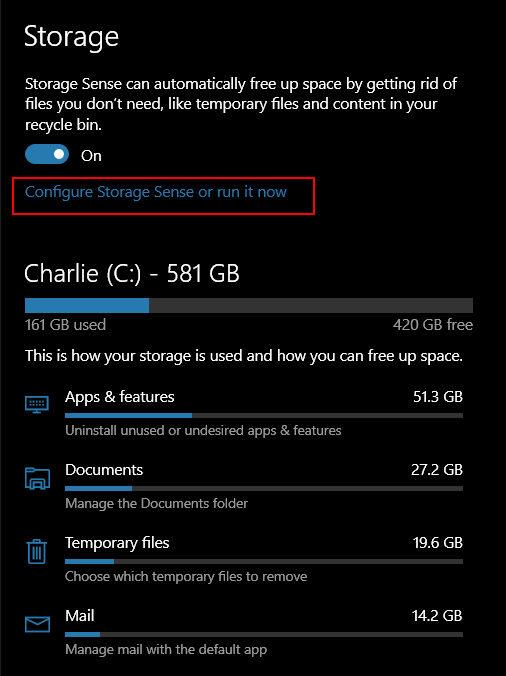
If you want to run a quick cleanup, click “Configure Storage Sense or run it now”.
Under “Temporary Files” make sure you check the selection box next to “Delete temporary files my apps aren’t using”. And then check to make sure you have “Never” selected under “Delete files in my downloads folder if they haven’t been open for more than:”. You can easily clean up your Downloads folder manually.

Next, under “Free up space now”, click the “Clean now” button.

That’s all there to using Storage Sense to do a basic cleanup. If you’re an advanced user and like to tinker with settings, you can fine-tune Storage Sense and customize it to your liking.
Windows 11 Storage Sense
Click the Start button and choose Settings from the Start menu. Then click on System > Storage. Yep! Just like Windows 10.
When Storage opens, click on “Storage Sense”…
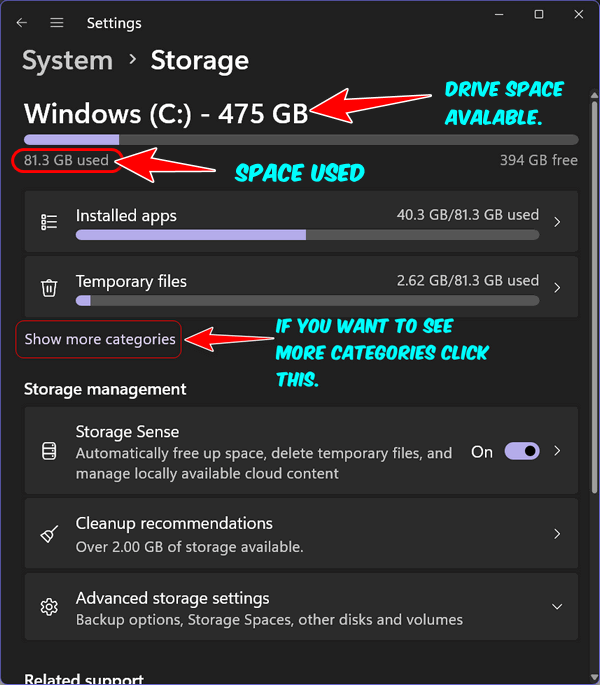
You can see in an instant how much free space you have and how much space you’ve used.
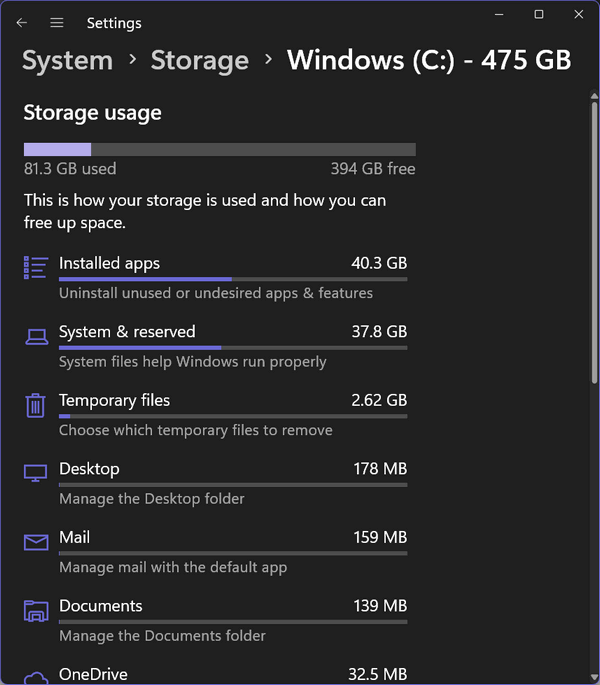
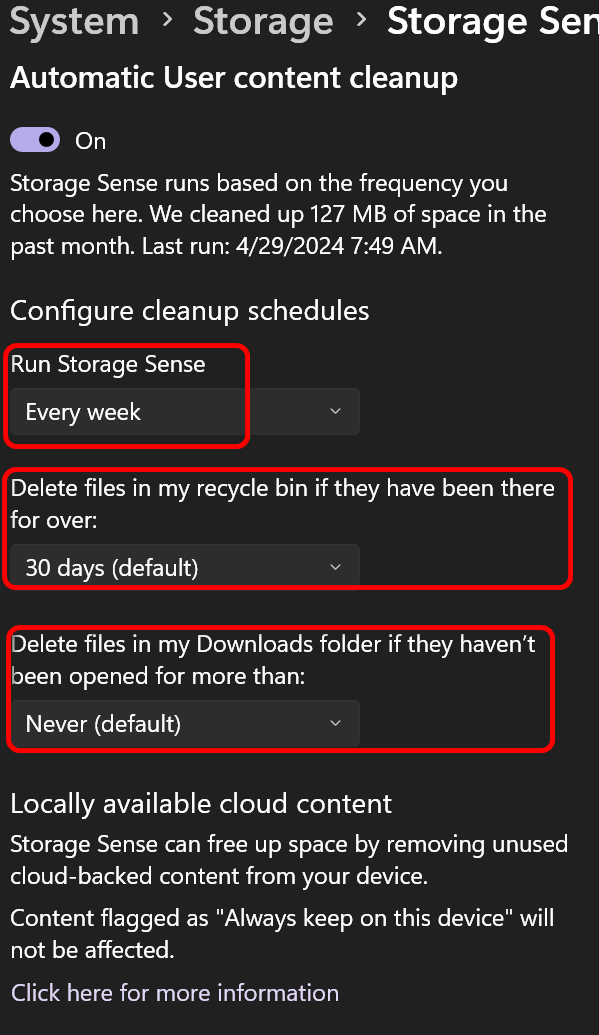
In the System > Storage > Storage Sense section, turn the switch to the “On” position under “Automatic user content cleanup”. If you want to see more categories, to get a better idea of where your space is being used and what can be cleaned up click on “More categories”.
You can set up Storage Sense to clean your computer at intervals from every day, every week, every month, or when disk space gets low. We suggest every week. We left all the other options set at “Default”. Unless you have some reason not to use the Default settings, we suggest you leave yours set at default too.
Windows lets you know which files are safe to clean.
So you don’t need any third-party clean-up programs to keep you Windows 10 or 11 computer clean. You can set up Windows Storage Sense to clean up your Windows 10 or Windows 11 PC.
doesn’t Registry Organizer do the same thing?
Not everyone has R.O. but every Windows 10 and Windows 11 user has Storage Sense.
R.O. does more but not everyone has it -every Windows 10 and Windows 11 user has Storage Sense.
Please tell us why you don’t like CCleaner???
Thanks!
CCleaner is owned by Avast and we don’t trust Avast…plus CCleaner has a checker past. See this article, for example.
Mabe Registry Org. may do the same, I don’t know but use R.O, still am glad to know about this.
does storage sense delete your stored passwords in its default settings.
No, it does not.