

Windows 10 Fall Creators Update Available Now
Windows 10 Fall Creators Update was released today. Most of you will get it via Windows Update channel, however it will be rolling out slowly, so it may be days, weeks, or even months before you get it via Windows Updates. If you’re in a hurry, keep reading:
Microsoft has just updated its Windows 10 downloads page to show Windows 10 Fall Creators Update. If you’re looking to be one of the first to get the Fall Creators Update, you can get it right now from the Microsoft Windows 10 download page.
You have several options when you visit the download page. You can update your computer directly from that page, you can create an installation USB or you can download a Windows 10 Fall Creators Update ISO file from which you can burn a Windows 10 Fall Creators Update installation DVD.
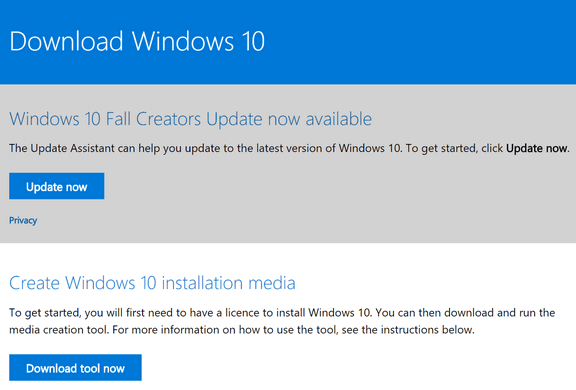
When you visit the Microsoft Windows 10 Fall Creators Update download page you’ll see two blue buttons. One says “Update now”. Choose that one if you want to update your PC to Windows 10 Fall Creators Update right away. If you want to create an installation USB or download an ISO file to create a Windows 10 Fall Creators Update installation DVD, click the button labeled “Download tool now”.
If you visit the page you’ll see a lot of instructions that are hidden under links. We’ve expanded and edited them for you so you’ll know what to expect when you visit the Microsoft Windows 10 Fall Creators Update download page.
The following was gleaned from that page and non-essential info (our opinion) was remove to make it clearer for you.
Here’s the info from the Microsoft download page:
Using the tool to upgrade this PC to Windows 10
Here’s when to use these instructions:
You have a license to install Windows 10 and are upgrading this PC from Windows 7 or Windows 8.1.
You need to reinstall Windows 10 on a PC you’ve already successfully activated Windows 10.
Before you install Windows 10, check to make sure your PC meets the system requirements for Windows 10.
We also recommend going to the PC manufacturer’s website for any additional info about updated drivers and hardware compatibility.
Select Download tool, and select Run. You need to be an administrator to run this tool.
On the License terms page, if you accept the license terms, select Accept.
On the What do you want to do? page, select Upgrade this PC now, and then select Next.
After downloading and installing, the tool will walk you through how to set up Windows 10 on your PC. All Windows 10 editions are available when you select Windows 10, except for Enterprise edition.
If you previously upgraded to Windows 10 on this PC and you’re reinstalling it, you don’t need to enter a product key. Your copy of Windows 10 will automatically activate later using your digital license.
When Windows 10 is ready to install, you’ll see a recap of what you’ve chosen, and what will be kept through the upgrade. Select Change what to keep to set whether you would like to Keep personal files and apps, or Keep personal files only, or choose to keep Nothing during the upgrade.
Save and close any open apps and files you may be running, and when you’re ready, select Install.
It might take some time to install Windows 10, and your PC will restart a few times. Make sure you don’t turn off your PC.
If you’d rather create installation media and not update directly from the page, this is for you:
Using the tool to create installation media:
Select Download tool now, and select Run. You need to be an administrator to run this tool.
If you agree to the license terms, select Accept.On the What do you want to do? page, select Create installation media for another PC, and then select Next.
Select the language, edition, and architecture (64-bit or 32-bit) for Windows 10
USB flash drive. Attach a blank USB flash drive with at least 8 GB of space. Any content on the flash drive will be deleted.
ISO file. Save an ISO file to your PC, which you can use to create a DVD. After the file is downloaded, you can go to location where the file is saved, or select Open DVD burner, and follow the instructions to burn the file to a DVD. For more info about using an ISO file, see Additional methods for using the ISO file to install Windows 10 section below.
After the installation media is created, follow the steps below to use it.
Using the installation media you created
Before you install Windows 10, it’s a good idea to save any work and back up your PC before you start. If you used the media creation tool to download an ISO file for Windows 10, you’ll need to burn it to a DVD before following these steps.
Attach the USB flash drive or insert the DVD on the PC where you want to install Windows 10.
Restart your PC, and then press any key to boot from the USB flash drive or the DVD.
If you restart your PC and your current version of Windows starts, you might have to open a boot menu or change the boot order in your PC’s BIOS or UEFI settings so that your PC boots from the media. To open a boot menu or change the boot order, you’ll typically need to press a combination of keys (such as F2, F12, Delete, or Esc) immediately after you turn on your PC. For instructions on changing the boot order for your PC, check the documentation that came with your PC or go to the manufacturer’s website.
If changing the boot menu or order doesn’t work, try again by signing in to Windows, shutting down, and then starting your PC.
On the Install Windows page, select your language, time, and keyboard preferences, and then select Next.
Select Install Windows.
A couple of things.
If you choose to burn a DVD from the ISO file, you don’t need any 3rd-party software. Place a blank, writable DVD into your CD/DVD drive, then double-click on the ISO file. Windows DVD burning software should open, unless you have another CD/DVD burning software program set as default. If you do, double-clicking the ISO file will open your default DVD/CD burning software.
Don’t be in a rush. When I installed Windows 10 Creators Update on my laptop, it took hours and hours. It looked like it had stopped… frozen in time. Be patience. Not everyone’s computer is the same. Some may update in 45-minutes while others may take 3 or 4 hours. Read about my experience with the last major Windows update in April 2017.
If you install the Fall Creators Update and it causes you problems or you don’t like it, you have 10 days to go back to your previous version of Windows.
If you don’t know what kind of processor, how much RAM you have, or whether you have 32-bit or 64-bit Windows:
- Right-click the Windows 10 start button
- Click Run
- Type
MSINFO32in the run box and press Enter - Everything will be displayed on the first page.
And finally, we are not recommending that you upgrade right away. It’s entirely up to you. Keep in mind it may well be months before most Windows 10 users will see Windows 10 Fall Creators Update via Windows Update.
If you ready to install the Windows 10 Fall Creators Update, visit to this page right now.
Will we have any problems in the future if we don’t update our Windows 10? In other words, can we just leave Windows 10 as it is without the update?
According to Microsoft, any version of Windows 10 can be upgraded to the latest version. However, Windows 10 versions have end-of-life dates. You can read more about that here.